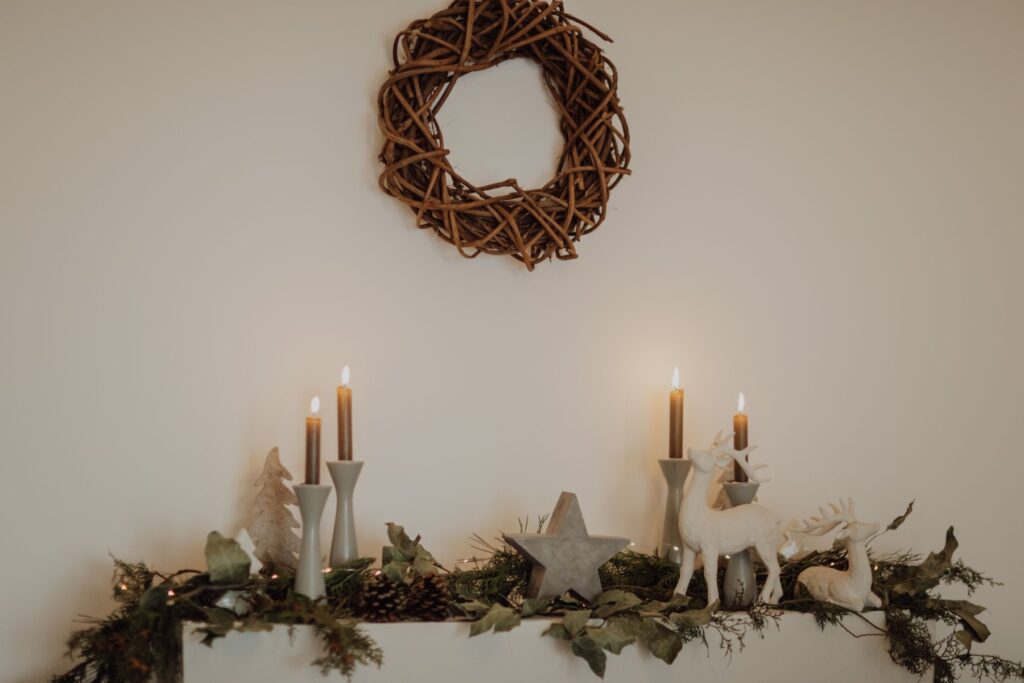
A Christmas mantel looks expensive when it is built in layers, from one focal point out to the smallest details, rather than covered all at once. Done in the right order, an $8 garland can pass for the one in the catalog.
The parts that trip people up are practical. Most mantels need more garland than they seem to, adhesive hooks won’t stick to every stone or brick surface, and real greenery above a working fireplace dries out faster than it would anywhere else in the house.
Below is the order designers and stylists work in, from the anchor piece to the stockings, including how to hang garland without a single nail.
1. Start with one anchor piece
Clear the mantel and dust it, then choose the one thing the eye should land on first: a mirror, a large piece of art, a wreath or an oversized branch arrangement. Everything else gets arranged around it, which stops a mantel from turning into a shelf of unrelated objects. Pick two or three colors at the same time, ideally ones already in the room or on the tree, and buy ribbon and ornaments to match.
If the anchor is art you already own, leave it up. A framed landscape or an old gilt mirror with greenery at its base often looks more considered than a mantel stripped back to Christmas-only pieces.
For something less traditional, New York interior designer Andi Federman suggested to Reviewed a large arrangement of birch branches or driftwood wound with white lights in place of garland, with candles in a mix of heights on either side, tapers down to votives.
2. Choose real or faux greenery
Decide this before buying anything, because it changes how much you spend and where the greens can go. Faux is the easier choice above a fireplace you actually use. Real greenery smells better and looks lush, but it dries out, and dried evergreens can catch fire from a candle or a fireplace, according to a holiday greenery fact sheet from Clemson Cooperative Extension.
If you go real, choose the species carefully. University of Minnesota Extension names Fraser fir and balsam as the longest-lasting greens for garland and the better pick for warm spots near a fireplace, and suggests keeping cedar and pine in cooler parts of the house.
Clemson’s advice is to recut the stems, crush woody ends and soak the greens overnight before arranging. Once they are dry, an anti-transpirant spray such as Wilt-Pruf helps hold in moisture, but skip it on cedar, blue spruce and juniper berries, where it damages the waxy coating. Every couple of days, bend a needle: it should flex, not snap. With that care, pine, fir and cedar can last several weeks indoors.
3. Measure for garland: 1.5 times the mantel
Measure the mantel shelf and multiply by 1.5. The design team at Ballard Designs uses that rule, so a 6-foot mantel needs about 9 feet of garland. Ballard also says there is no fixed rule for how far the ends should hang, so add a few extra feet if you want long tails falling down the sides rather than a garland that stops at the corners.
Buying two or three shorter strands instead of one long one gives you a head start on fullness (step 5).
4. Hang the garland without nails
Removable adhesive hooks are the usual fix. Command’s own mantel decorating project puts clear hooks on the sides of the mantel, keeps them away from the area directly above the fire, and uses a wire toggle hook set on the shelf itself to hold the middle of the garland. Clean the spot first: Command’s faux holiday mantel project says to clean the surface with rubbing alcohol, let it dry and wait an hour before hanging stockings.
Adhesive won’t grip every surface. Georgia home blogger Kelley Nan found that her stone ledge was a poor surface for adhesive hooks, so she drapes and bends her garland in place instead. For stone, brick or rough wood, weight works better than glue. Nina Lichtenstein, founder and principal designer of her own interior design studio in the Northeast, told Livingetc that heavy candlesticks or bookends can pin a garland in place, and that ribbon tied off under the shelf, or fishing line run to a hook behind, are other no-nail routes. Clamp-style clips that grip the shelf edge also work; more on those under stockings.
5. Layer cheap garland so it looks full
Two or three cheap garlands layered together look fuller than one expensive strand. Laura, who writes the home blog The Turquoise Home, starts with three adhesive hooks along the top of the mantel, one in the center and one at each end. She attaches an inexpensive, bendable 6-foot garland to the center hook with floral wire and drapes it over the end hooks. The second and third garlands never touch the hooks: she bends the stems of the first garland around them to hold them in place. She fluffs after every layer, because that is when the bare patches show.
Laura Lawler, assistant manager at The Mercantile by Miller in Birmingham, Alabama, told StyleBlueprint she builds the whole piece on the floor first: lay out the garland, add stems, ribbon and ornaments, zip-tie them together, then lift the finished garland onto the mantel and hide the ties under florals. She also tucks real magnolia, cedar or eucalyptus into faux greenery and mists the real stems now and then.
6. Build height at the ends, then step down
Once the garland is up, add the bigger pieces. Michaela Criniti, an interior designer with Urban Country Designs in Washington, D.C., told Reviewed she puts a tall piece at each end of the mantel and steps down toward the middle with votives and greenery, so the eye travels the whole length. Tall brass candlesticks, a pair of lanterns or two small potted trees all work at the ends.
Work from back to front, too. Jamie Young, founder and president of the California lighting and decor company Jamie Young Co., told Homes & Gardens to put the largest piece at the back with smaller ones in front, and not to crowd a small mantel.
Symmetry isn’t required. Shea McGee, the Utah designer behind Studio McGee and McGee & Co., layered five garlands in an Instagram video, bunching three at one corner and tapering them across the shelf, with the stockings clustered on one side, Homes & Gardens reported. An off-center mantel suits a room where the art or the fireplace already sits to one side.
7. Add lights and candles safely
Use only lights tested by a nationally recognized testing laboratory, and check each set for broken sockets and frayed wires before it goes up, the U.S. Consumer Product Safety Commission advises. Start wrapping lights at the middle of the garland and spiral them out along the sturdier branches to each end. Battery-powered fairy lights avoid a cord running down the side of the fireplace; tuck the battery pack behind the garland or under the shelf. The same CPSC release warns against burning wrapping paper in the fireplace, because it can flash-fire.
For candles, the U.S. Fire Administration says to keep a lit candle at least 12 inches from anything that can burn, and suggests flameless battery candles instead. A real flame on a garland-wrapped mantel rarely has 12 inches of clear space, which makes flameless tapers the practical choice there. The USFA’s candle safety page also says to blow candles out when you leave the room or go to bed.
The USFA’s 3-foot rule is written for Christmas trees, which it says should stand at least 3 feet from heat sources, fireplaces included. There is no matching official distance for mantel garland, but the same caution makes sense: nothing should hang down over the firebox opening, and Command’s guidance keeps hooks away from the area directly above the fire. If you light fires often, keep the greenery on the shelf and leave the front of the fireplace clear.
8. Hang the stockings last
Stockings go up last, once the garland is set, so they hang in front of it rather than getting tangled in it. Clamp holders suit a mantel with a lip. The Original MantleClip, sold at Target, is rated to hold up to 10 pounds, fits mantels from half an inch to 3 inches thick, and can hold garland and lights as well.
Weighted holders that sit on top of the shelf suit mantels too deep for a clamp; leave room around them so they don’t crowd the candles.
Stockings don’t need to be spaced evenly across the full width. Kelley Nan groups her four on the far right of the mantel, and McGee clustered hers on one side, hung from hooks hidden under the garland. A tight group looks intentional with any number of stockings, and it suits an asymmetrical garland.
What if there’s a TV over the fireplace?
Shannon Acheson of the home blog Homemade Lovely keeps everything below the screen’s sightline and clear of the TV’s remote sensor. She swags the garland along the front edge of the shelf, groups the stockings to one side, and uses battery candles instead of real flames under the screen. Low, horizontal pieces, such as garland and a few bowls of pine cones or ornaments, suit that narrow band better than tall candlesticks.
No fireplace? Make a mantel anywhere
A console table, a deep windowsill, the top of a bookcase or a sideboard can be styled the same way, from anchor to garland to candles. For stockings, Home Depot’s guide suggests a staircase railing, a headboard, a curtain rod, a bookcase, the knobs on a console or a branch mounted on the wall, hung with adhesive hooks or ribbon.
Common Christmas mantel mistakes
- Too little garland. One thin strand across a long mantel looks sparse. Use the 1.5 rule and layer two or three strands.
- Competing with the tree. Troy Villager, owner and designer at T. Villager Designs in Nashville, told StyleBlueprint to skip mantel greenery when the tree stands right beside the fireplace, so the two don’t fight for attention.
- Everything at one height. A row of same-size objects reads flat. Go tall at the ends and low in the middle.
- No breathing room. Leave a little bare shelf between groups, especially on a small mantel.
- Hooks and cords on show. Fluff the garland over every hook and run cords behind it.
- Dry greens above the fire. Do the needle bend test every few days and swap out anything brittle.
What a Christmas mantel costs
At the budget end, a 9-foot unlit Canadian pine garland from Target’s Wondershop line is $8 at the time of writing, so three layered strands come in under $25. The Turquoise Home sorts faux garland into three tiers: basic strands at $10 to $20, mid-range at $30 to $40, and realistic-looking garland at $60 to $100. At the top end, Pottery Barn’s faux lit cedar berry pine wreath and garland collection runs from $99.50 to $199 at the time of writing. A 4-pack of MantleClips listed at $24.49 before sale pricing.
If you change only one thing, layer the garland: two or three inexpensive strands layered and fluffed look richer than one pricey strand on its own. Then keep real flames and dry greenery away from the fire, and the mantel will hold up from Thanksgiving weekend until it comes down.